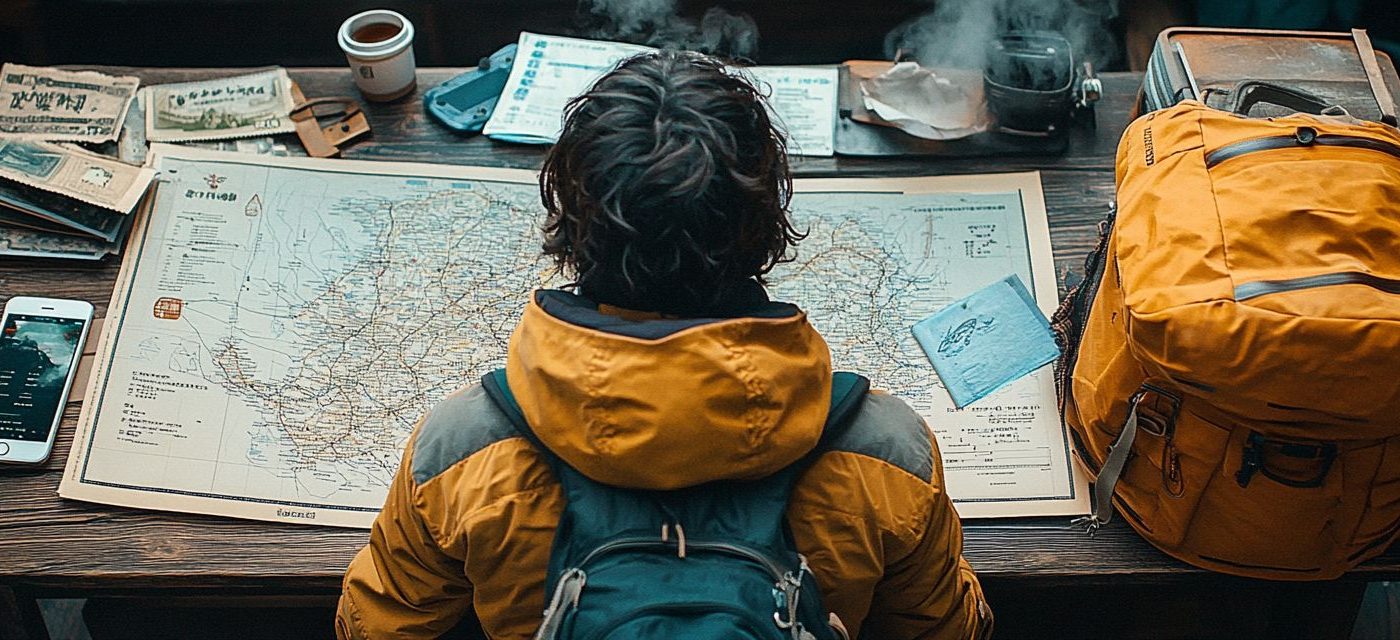
Set the Stoke You’ve read about the snow. You’ve drooled over the resorts. Now it’s time to make it real. This one’s your go-to for actually getting to Japow – no fluff, just the good stuff. Flights? Sorted. Budget? Cracked. Gear? Packed and waxed. Let’s get you from daydream to deep pow. ✈️ 💸 🏂
✈️ Flights to Japow – Finding Your Line In the Sky
The powder’s calling – but first, you’ve got to get there. Most international riders land in Tokyo (Narita or Haneda), then catch a domestic flight to New Chitose Airport (CTS) in Sapporo. If you’re coming from Australia or Asia, you might even land a direct route.
✅ Tips for Airfare Hacks:
- Use Google Flights or other travel search engines with “flexible dates” – Japanuary deals can surprise you.
- Flying into Tokyo? ANA and JAL offer sweet domestic fares for international tourists. Flights run almost hourly, super flexible.
- Book early it saves you money, at least 2–3 months ahead. Honestly, 6 months is even better if you already know your dates.
💥 How I Did It:
We booked directly with SWISS as we flew out of Zurich, easy and seamless. Because we booked early, we ended up saving over CHF 550. We reserved the entire route (Zurich to Sapporo) in one go, which made everything super smooth. We had a delay arriving in Haneda and missed our connection. Still, no stress: the ground staff even though no one really spoke English rebooked us on the next flight an hour later without blinking. The whole process was calm, very Japanese in the best way.
🧳 Luggage & Airbag Backpacks – What You Need to Know
If you’re bringing your own snow gear (which I totally recommend), there are a few things to keep in mind when it comes to packing and air travel logistics.
✅ Checklist:
- Register your sports luggage: Rebook one of your luggage pieces as sports luggage via the airline hotline a few days before departure to avoid surprising fees.
- Register your avalanche backpack: Inform the airline in advance if you’re flying with an avalanche backpack.
💥 How I Did It:
We brought all our gear – boards, boots, avalanche packs, the whole circus 🎪 – and paid zero extra baggage fees. Long-distance flights often include 2 checked bags, so we rebooked one as sports luggage via the airline hotline. Smooth move but do it a few days in advance, the online options rarely work.
And the airbag backpack? We brought one in checked and one in carry-on. Every airport (Switzerland and Japan) wanted to see the gas cartridge documentation. Print it, carry it, be ready. On the way home? Nobody blinked, classic!
Extra tips:
- ✨ Carry the gas cartridgeinside the backpack, with the printed documentation, but not connected to the inflation system. They’ll always want to see the whole setup, so make it easy to show.
- ⚠️ You’re only allowedone cartridge per person. Don’t try to bring a backup -they’ll confiscate the second one. Yup, I met someone who learned that the hard way!
💸 Budget Breakdown – What Japow Really Costs
Japow isn’t just for pro riders and influencers. With a little planning, it’s surprisingly doable, especially compared to the Alps or North America.
✅ Our Roughly Budget for 4 weeks (CHF):
- Flights: ~ 1000.-
- Accommodation: ~ 1600.-
- Lift tickets: ~ 650.-
- Rental Car & Gasoline: ~ 550.-
- Food, drinks and the rest: ~ 800.-
➔ Total: ~ 4’500-5’000.- for 4 Weeks all in all
💥 How I Did It:
We rolled deep with friends, shared Airbnbs, split transport, and took turns buying snacks like it was a snow trip from high school. Most meals? Konbini classics, ramen shops, or traditional restaurants. Gourmet powder days, budget bites. It worked.
✨ We had a good life! We booked most of our places early via Airbnb or booking and scored some sweet deals. Booking directly with smaller lodges sometimes got us better rates too. Some regions also offer online discounts, or early bird passes for lift tickets, don’t sleep on those! Long story short: early planning pays off.
🎒 What to Pack – Japow Gear Checklist
Hokkaido can get cold. We’re talking about -20°C, snow up your sleeves, and goggles fogging mid-run. Don’t mess around, if you’re not properly layered, you’ll feel it.
✅ Essentials:
- Outerwear: waterproof + insulated (20K+ rating recommended)
- Base layers: merino wool — warm, breathable, and doesn’t stink after day 3
- Mid-layer: fleece or down jacket
- Gloves + liners (bring at least two pairs — theywill get wet)
- Low-light goggles — Japow is all about storm days
- Helmet
- Beanie
- Powder board and bindigns
- Boots
- Tool for bindings and quick repairs
- Casual everyday clothes — cozy, functional, and layerable
- Warm winter jacket for off-mountain – it getscold even in town
- Daypack for snacks, layers & avalanche gear
- Adapter – Japan has different plugs and voltage (Type A/B, 100V)
- Passport and driver’s licence
- Credit card
- eSIM
- Travel insurance
Nice-to-Haves:
- Boot dryer – lifesaver if your accommodation doesn’t have one (ours didn’t)
- Avalanche gear: beacon, probe, shovel (essential if you’re heading off-piste)
- GoPro or action cam – because your friends won’t believe that face shot without proof
- Touring gear
Want this whole packing list in a handy format you can tick off while prepping?
👉 Download the Japow_Adventure_Checklist
💥 How I Did It:
I packed enough for one full week, knowing we could do laundry along the way. Every place we stayed had a washing machine, even the little Airbnbs so traveling light was no problem.
As for toiletries: skip the shampoo and body wash. Seriously. Every single place had high-quality, often local-brand products ready to go. I brought my own shampoo and flew it back home unopened after four weeks.
If you’re a reader, pack your own book, especially if you prefer English. You won’t find much selection locally unless you’re in a big city. Quiet snowy nights and a good book? Absolute bliss.
🚗 Car Rental in Japow – Snowy Roads & Smart Moves
If you’re planning to chase pow in Hokkaido, having your own set of wheels is game-changing — especially if you’re exploring multiple resorts or staying in more remote areas. But there are a few quirks to renting a car in Japan that you’ll want to know ahead of time.
✅ What to Check Before Booking:
- Use online platforms to compare rates — we booked via an aggregator (you could also try Booking.com or similar).
- Look for abigger car if you’re bringing board bags or lots of gear. Trunk space fills up fast.
- Make sure to filter for4WD (four-wheel drive) and snow chains — but here’s the twist:
- Not all providers actually deliver on those options, even if selected online. Check directly with the rental company.
💥 How I Did It:
We booked our car online in advance, found a good deal, and paid ahead. We looked for something with enough space for board bags and specifically filtered for 4×4 with snow chains. Sounds solid, right? Well… when we picked up the car, it was not a 4WD, had no chains, and the staff kindly asked us to sign a waiver promising not to drive in snow conditions. In Hokkaido. In January. 😂 Obviously, within 10 minutes we were on snow-covered roads.
But honestly? No drama. The winter tires in Japan are amazing, and we never had an issue. The car sat a bit low, so we had to take it slow over snow holes and uneven parking lots, but it was totally manageable — especially since we had good insurance.
✅ License Rules – This One’s Important:
Here’s the thing: you can’t just use an international driver’s permit. What you actually need is a Japanese translation of your original driver’s license — and that’s where it gets tricky.
- You can only get this translation once you’realready in Japan
- It takes around 2–3 business days (sometimes more)
- You then have toprint it at a 7-Eleven, which works but eats time
💥 How I Did It:
That obviously doesn’t help if you want to hit the road right after landing. So we found a workaround: we ordered our license translations online before the trip. It cost a bit more, but was 100% worth it and saved us from any drama at pickup.
Here’s the link we used: 👉 driving-japan.com – Japanese license translation service
📶 Staying Connected – Easy eSIM Setup for Japow
Forget airport SIM card booths and confusing data plans — staying connected in Japan is super easy with an eSIM. If your phone supports it, you can set everything up before you even leave home.
✅ Why eSIMs are the move:
- No need to swap your physical SIM card (your main number stays active)
- You can activate your plan the moment you land
- Flexible data packages that work across Japan
- Perfect for checking weather, avalanche reports, or translating menus on the fly
💥 How I Did It:
We booked our eSIMs through Airalo before the trip and couldn’t have been happier. Set up was super simple — download the app, choose your plan, scan the QR code, and boom: connected.
Reception was great even in more remote mountain areas, and we always had enough data to check snow forecasts, access Google Maps, or send powder-stoke pics to the group chat.
Tip: activate it right before you board your flight or during your layover so it’s ready as soon as you land. No airport stress, no queueing, just signal.
🛂 Entry Made Easy – Immigration QR Code Setup
Japan is smooth, but immigration can take time — especially if you’re coming off a long-haul flight with a tight connection. Luckily, Japan has a digital system that makes the whole arrival process way easier (and faster).
✅ What You Need to Do:
- Before your trip, register on Visit Japan Web
- Fill in your personal info, immigration, and customs details
- At the end, you’ll receive a QR code for immigration and another for customs
- Save both codes on your phone (screenshot or in the app)
💥 How I Did It:
We registered on the Visit Japan Web platform a few days before departure and received a QR code for airport immigration. When we landed, we just walked straight up to the digital gates, scanned the code, and were through in minutes.
Especially with a connecting flight on the same day, this system is genius. We saved a ton of time and avoided the long lines completely. Highly recommend doing this in advance — it’s simple, free, and totally worth it.
🗺️ Smart Navigation – Our Custom Google Maps Setup
Planning is fun, but when you’re actually on the ground in Japan, having all your saved info in one place is a total game-changer. We made a custom Google Maps list before the trip — and honestly, it became our Japow travel bible.
✅ How to Set It Up:
- Create a new list in Google Maps (on desktop or in the app)
- Drop pins for everything: resorts, onsens, restaurants, shops, and hidden tips
- Add your own notes (like opening hours or “must-try ramen here!”)
- Share the map with friends — they can add their own spots too
- Use it offline by downloading the area beforehand
💥 How I Did It:
I created the map before the trip, added all the places I had researched or got recommended, then shared it with our group. Everyone could drop their own pins and comments — so we gathered all our ideas, links, and personal tips into one single map.
Once we were in Japan, we used it like a real-time decision tool: open the map, see what’s nearby, pick a plan. No more endless scrolling or group chats like “what was that place again?”. It worked so well — especially in smaller towns where options are limited and distances matter.
Bonus: it even helped us find convenience stores, cash machines, and random little bakeries we never would’ve discovered otherwise.
🎿 Lift Passes in Japan – Skip the Lines, Ride the Lines
The way ski passes work in Japan is pretty different from Europe or North America. You don’t need to queue at a lift station every morning — but you do need to know how and where to book.
✅ What You Should Know:
- Many resorts offer online ticketing — sometimes with early bird deals
- Some passes are multi-resort friendly, especially in regions like Niseko or Hakuba
- Most lift passes are RFID cards – you tap them at gates, no pockets-emptying needed
- Some resorts require a deposit for the RFID card (you’ll get it back when you return it)
- IC cards (like Suica) are not the same as ski passes — just to avoid confusion
💥 How I Did It:
We booked most of our tickets online a few days in advance — some through the official resort websites, others via regional apps. Honestly, it saved us a ton of time and we often paid less than the walk-up price.
In bigger resorts like Niseko, the RFID system was flawless — just tap and go. In smaller resorts, we did sometimes have to pick up a physical card at the counter, but even then, no long lines or stress.
Tip: check if your accommodation offers discounted lift passes — several Airbnbs and guesthouses partner with local resorts and can hook you up with a better rate.
Planning is one thing – staying safe in deep powder is another. Let’s talk about freeride safety next: The Ultimate Japow Guide: Freeride Safety – Apps, Rules and Survival
Until then: ride smart, trust your gut, and stay avalanche-aware.
More about Japow:
The Ultimate Japow Guide


 Freeride Safety, Apps, and Survival Rules
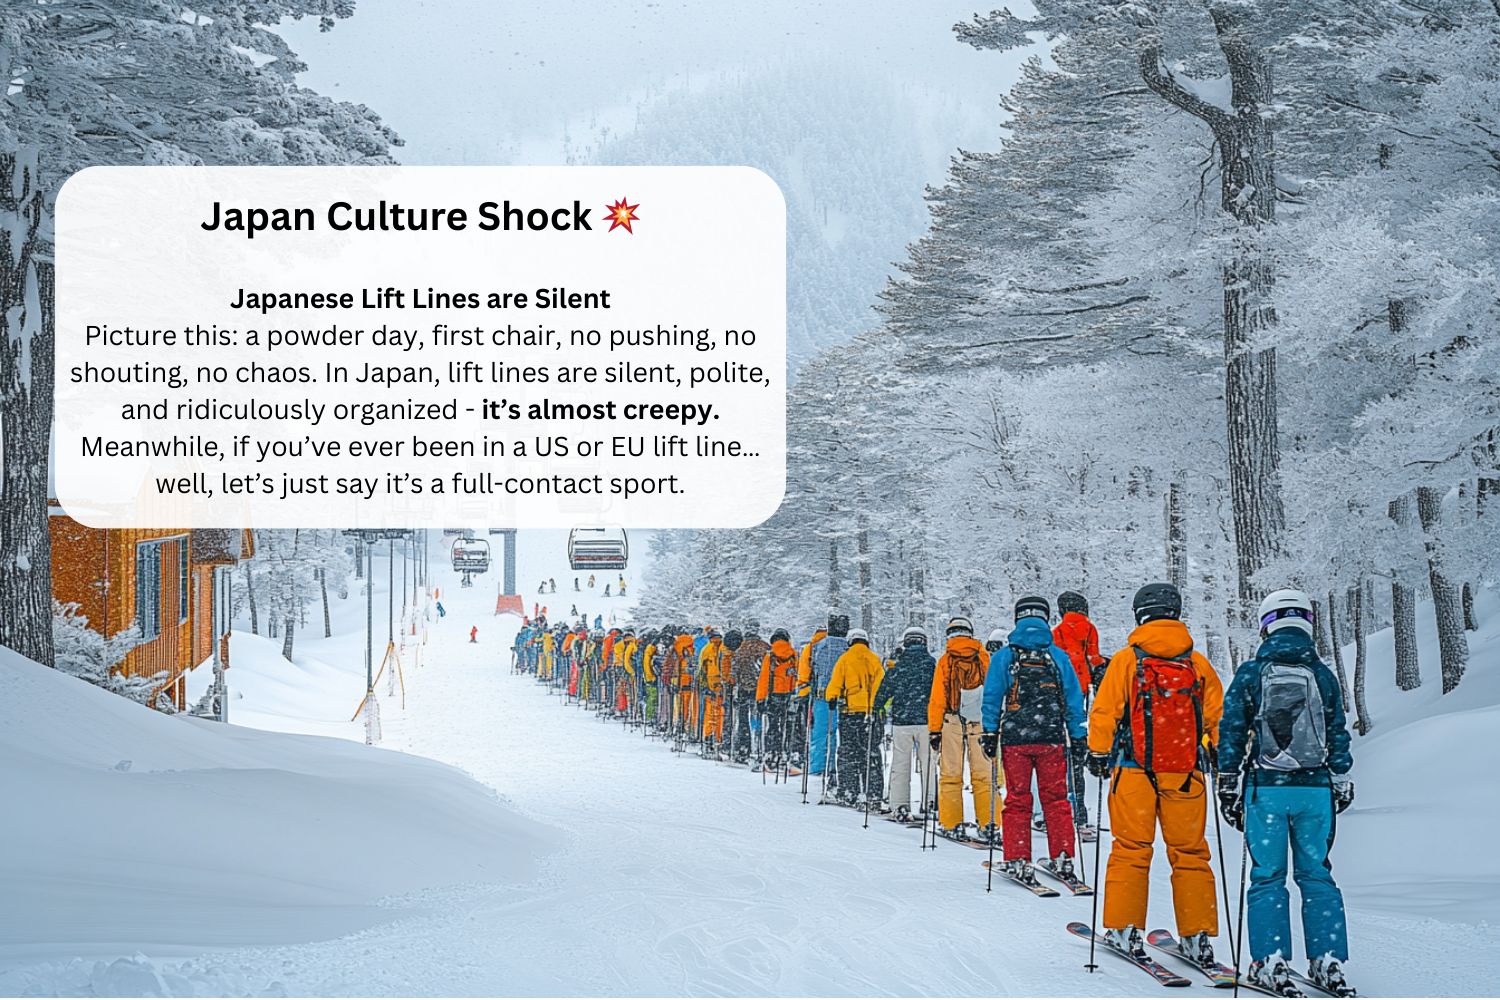
![]() The Culture of Japan – Beyond the Powder
The Culture of Japan – Beyond the Powder
Media: All video footage is owned by me. Some images were generated using Midjourney AI.

Hey Michèle, I really like your Japan Culture Shock pictures, they give a nice spirit to your blog articles! I’m want to experience such a silent line, because I usually feel very stressed in Switzerland waiting for the lift 🚡🤯
Aw thank you so much, Géraldine! 🥰 And yes—those quiet, respectful lift lines in Japan really are a form of therapy. 😌 I totally get the Swiss lift line stress… been there, panicked that! Hope you get to soak up some of that peaceful Japow magic soon 🚠✨