Once you dive into Big Data, you’ll quickly stumble across Apache Spark, a fantastic technology for analysing big data. And if you are anything like me, the fastest way to learn something is by doing it.
So you figure, „It can’t be that hard,“ and look for some file to download, install it, and write some queries. Alas, it’s not that easy. Apache Spark is not just a tool; it’s a platform. How can we use it then? Well… by setting up a cluster! Once that is up and running, you can run Spark queries against it using Jupyter or Zeppelin.
The goal of this post is to provide a step-by-step guide on how to set up an Apache Spark cluster in the cloud without any technical know-how, upfront cost, or local installation, and let you write your first Spark query in just 5 minutes.
The HSLU way
But before we get to the guide, I’d like to explain my motivation behind this blog post.
As part of the CAS Big Data & Applied Data Science, you’ll be following these instructions. It will take you through a guide that essentially contains these steps:
- Create an AWS account
- Commission an Ubuntu VM
- Copy a Docker script to install all components (such as Spark, Zeppelin, etc.)
- Open the firewall to your VM
- Copy files into Minio (storage bucket) via the command line
- Connect to Zeppelin and start running queries
There is also an alternative guide, where you do the same but run it locally using Docker, which is what I did during the lesson. I found this to be quite fun, as I was familiar with the command line and was keen on playing with Docker files.
However, the entire guide felt strange to me. There were a lot of complicated steps, and I ran into a bunch of errors that required a lot of Googling. Our lecturer spent roughly 4 hours explaining things like virtualizations, containers, firewalls, command lines, etc. To me, again, this was interesting, and I was following happily.
It got me wondering: How are my non-techie classmates dealing with this? And truly, some of my peers felt overwhelmed and didn’t know what to do with all the information.
It Can’t Be That Hard, Can It?
So I figured: It’s 2022, there must be an easier way to get started with Apache Spark and big data, right? Maybe there was an easier way that would not require terminals, containers, and firewalls. A few minutes of research gave me the answer. Yes! There are some really cool solutions that seem to be easy to use.
I came across cool platforms such as Databricks, Azure Synapse, and Google Dataproc. Initially, I wanted to try Databricks, but I did not manage to find an easy way to get started. However, Dataproc on the Google Cloud Platform seemed more accessible.
I am not going to lie; there were issues too. Those problems were mostly related to me never having used Apache Spark or GCP before. But once I figured it out, it was as easy as could be. And so, I want to share this knowledge with you.
Let’s setup Spark in 5 minutes
Summary
- Sign up with Google Cloud Platform
- Create Dataproc cluster
- Upload sample data
- Connect via Zeppelin
- Run your queries
Step by Step
- Go to cloud.google.com and log in with your Google Account
- Register your credit card (you won’t be charged, as unlike AWS, with Google you get $300 free credit)
- In the Console, search for Dataproc
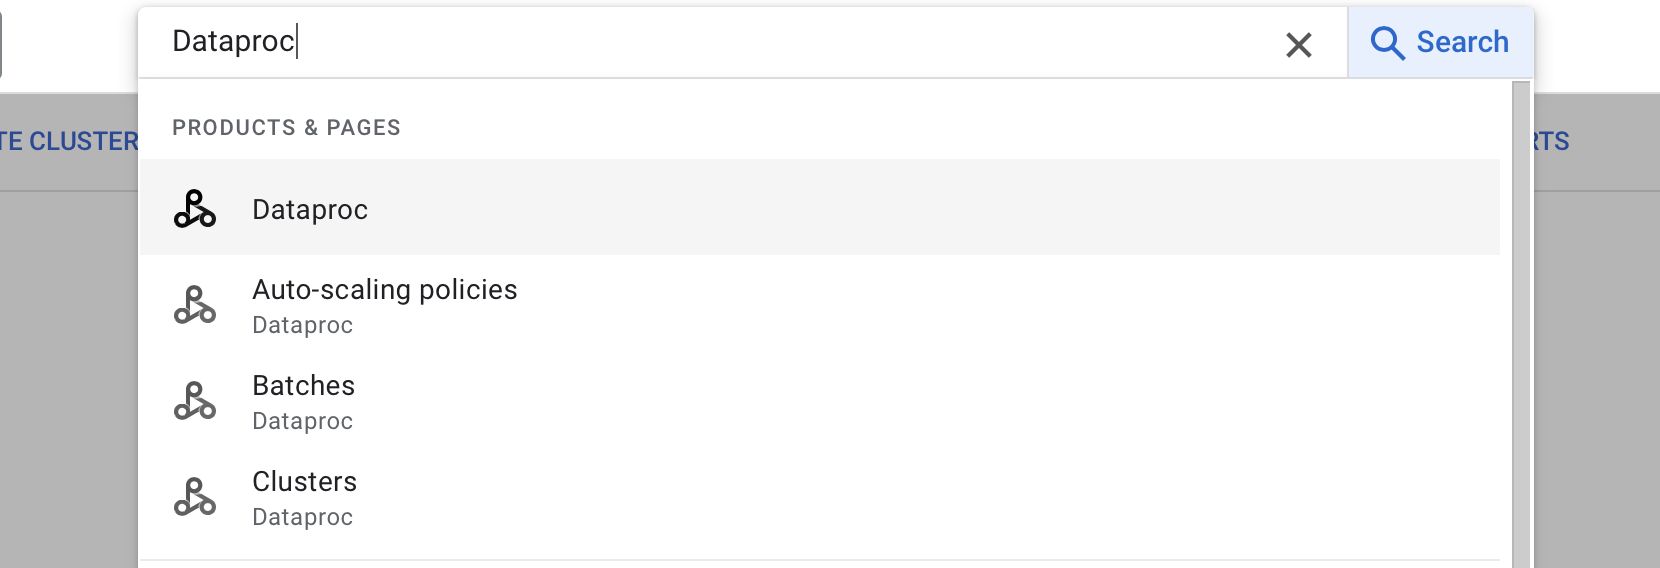
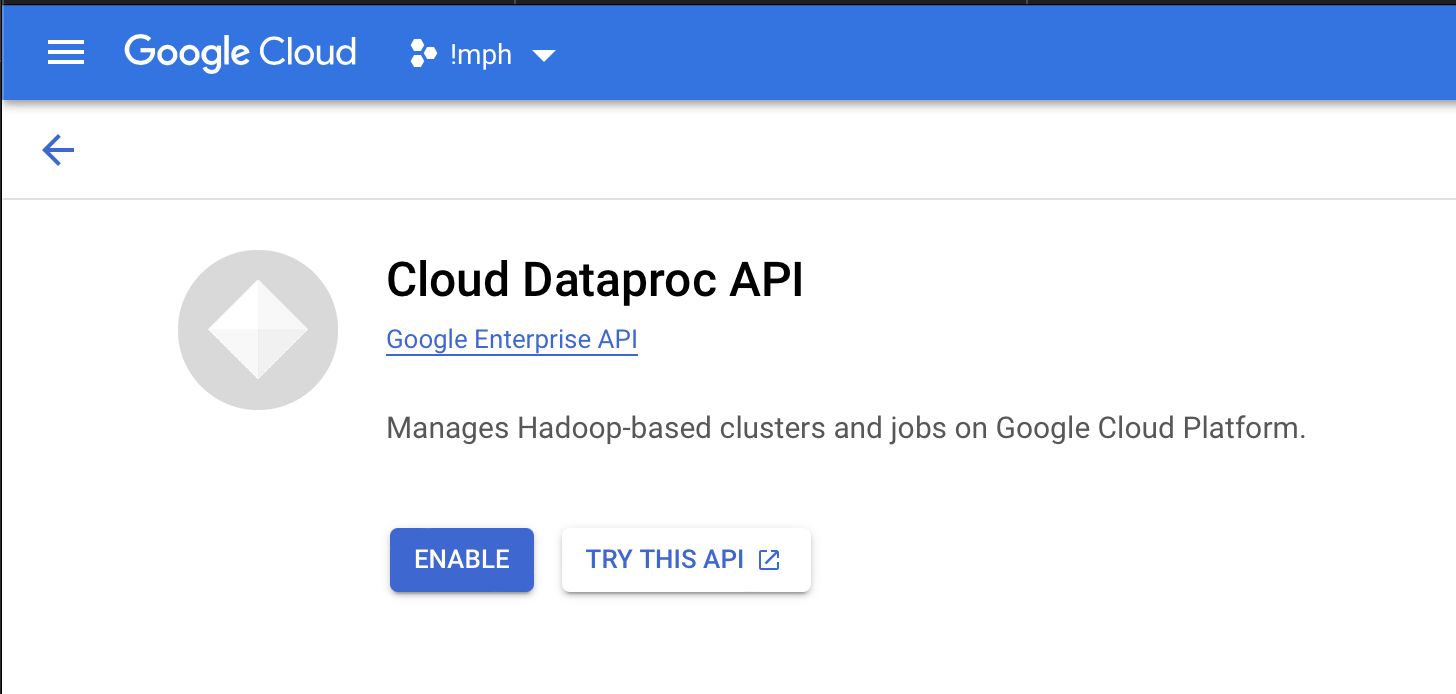
- Enable the API (one click)
- Create your first Cluster by choosing Cluster on Compute Engine

- Chose a name you like and a region that is close to you:

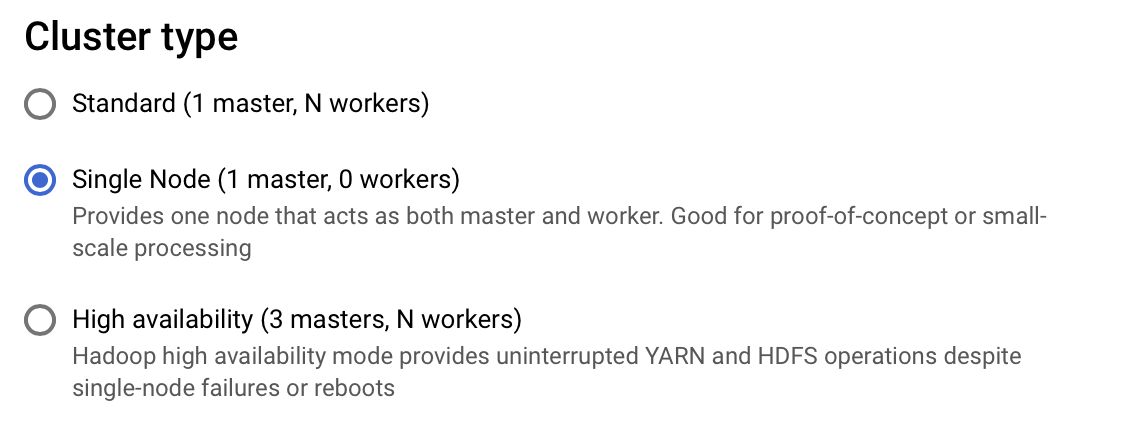
- Chose either Standard or Single Node (the later uses fewer credits and should is enough to beginn with)
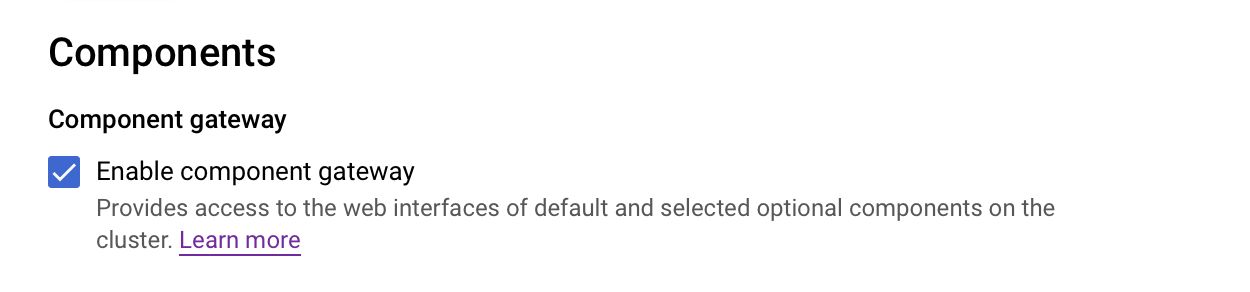
- IMPORTANT: Enable Component Gateway. Otherwise, you won’t be able to connect to Jupyter or Zeppelin.
- Pick the Services you like (to get started, you just need Jupyter and Zeppelin)

- Click create! You should now see you cluster being created (takes roughly 2-3 minutes)
- Now your cluster is ready and running Apache Spark for you! But you’ll also notice that on the very right of your cluster, the overview shows a „Cloud Storage staging bucket„

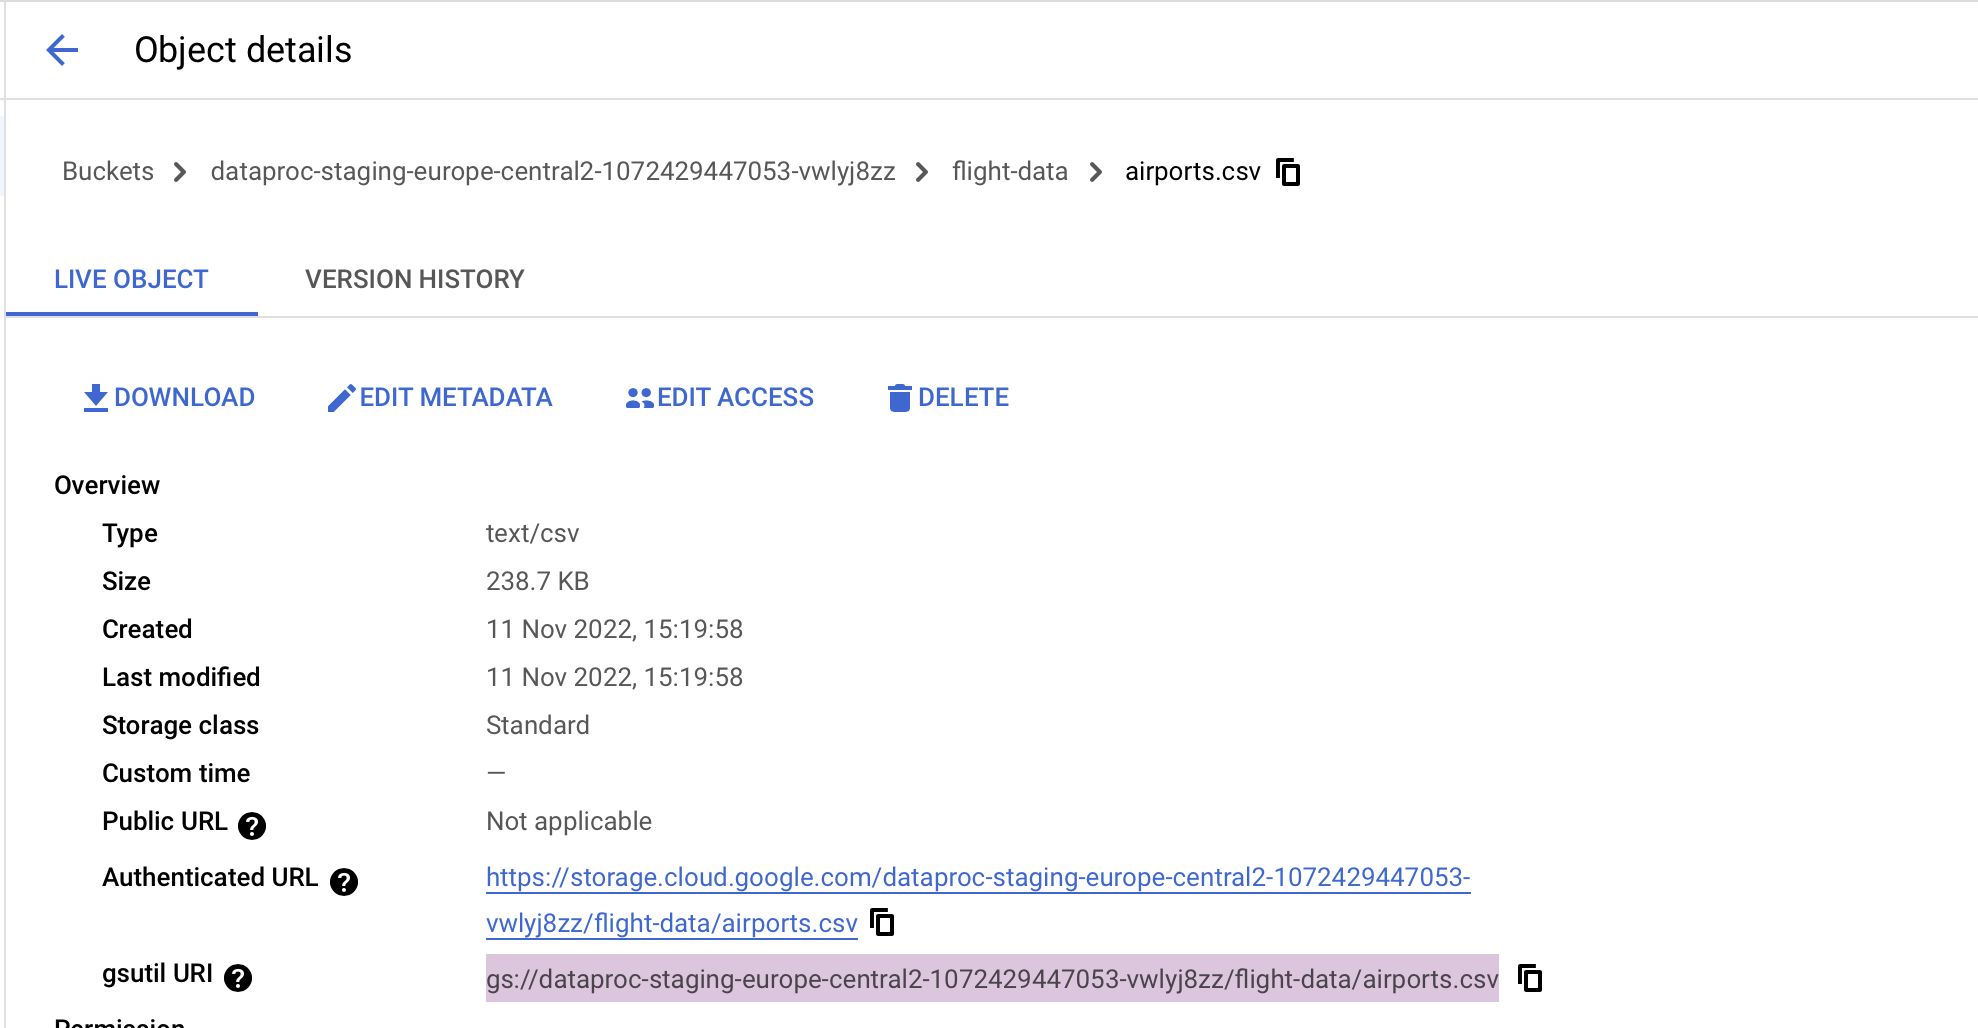
- This is where you can drop your „big data“ and easily access it from Jupyter/Zeppelin. So let’s click on that Storage bucket and upload some files to work with. For this example I’ll be using the demo flight data from the repository we used during the lesson.
- Download this ZIP from the repository and extract the ZIP file locally
- Click on your Cloud Storage and click Upload Folder and choose the extracted flight data
- Bonus Tip: Go into the flight-data folder and click any CSV (e.g., airports.csv) and copy the gsutil URI (we’ll be using this path in the next step)
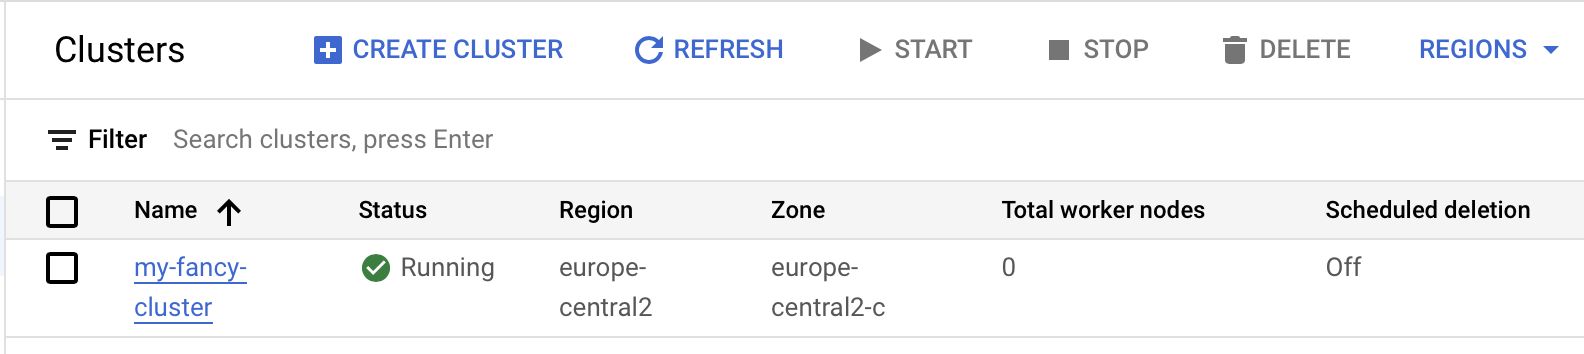
With your data ready, we can head back to our cluster and start analysing it!
Tip: If you can’t find your cluster in GCP anymore, just search for Dataproc and click on Clusters.
- Open your Cluster by clicking on the name in the overview
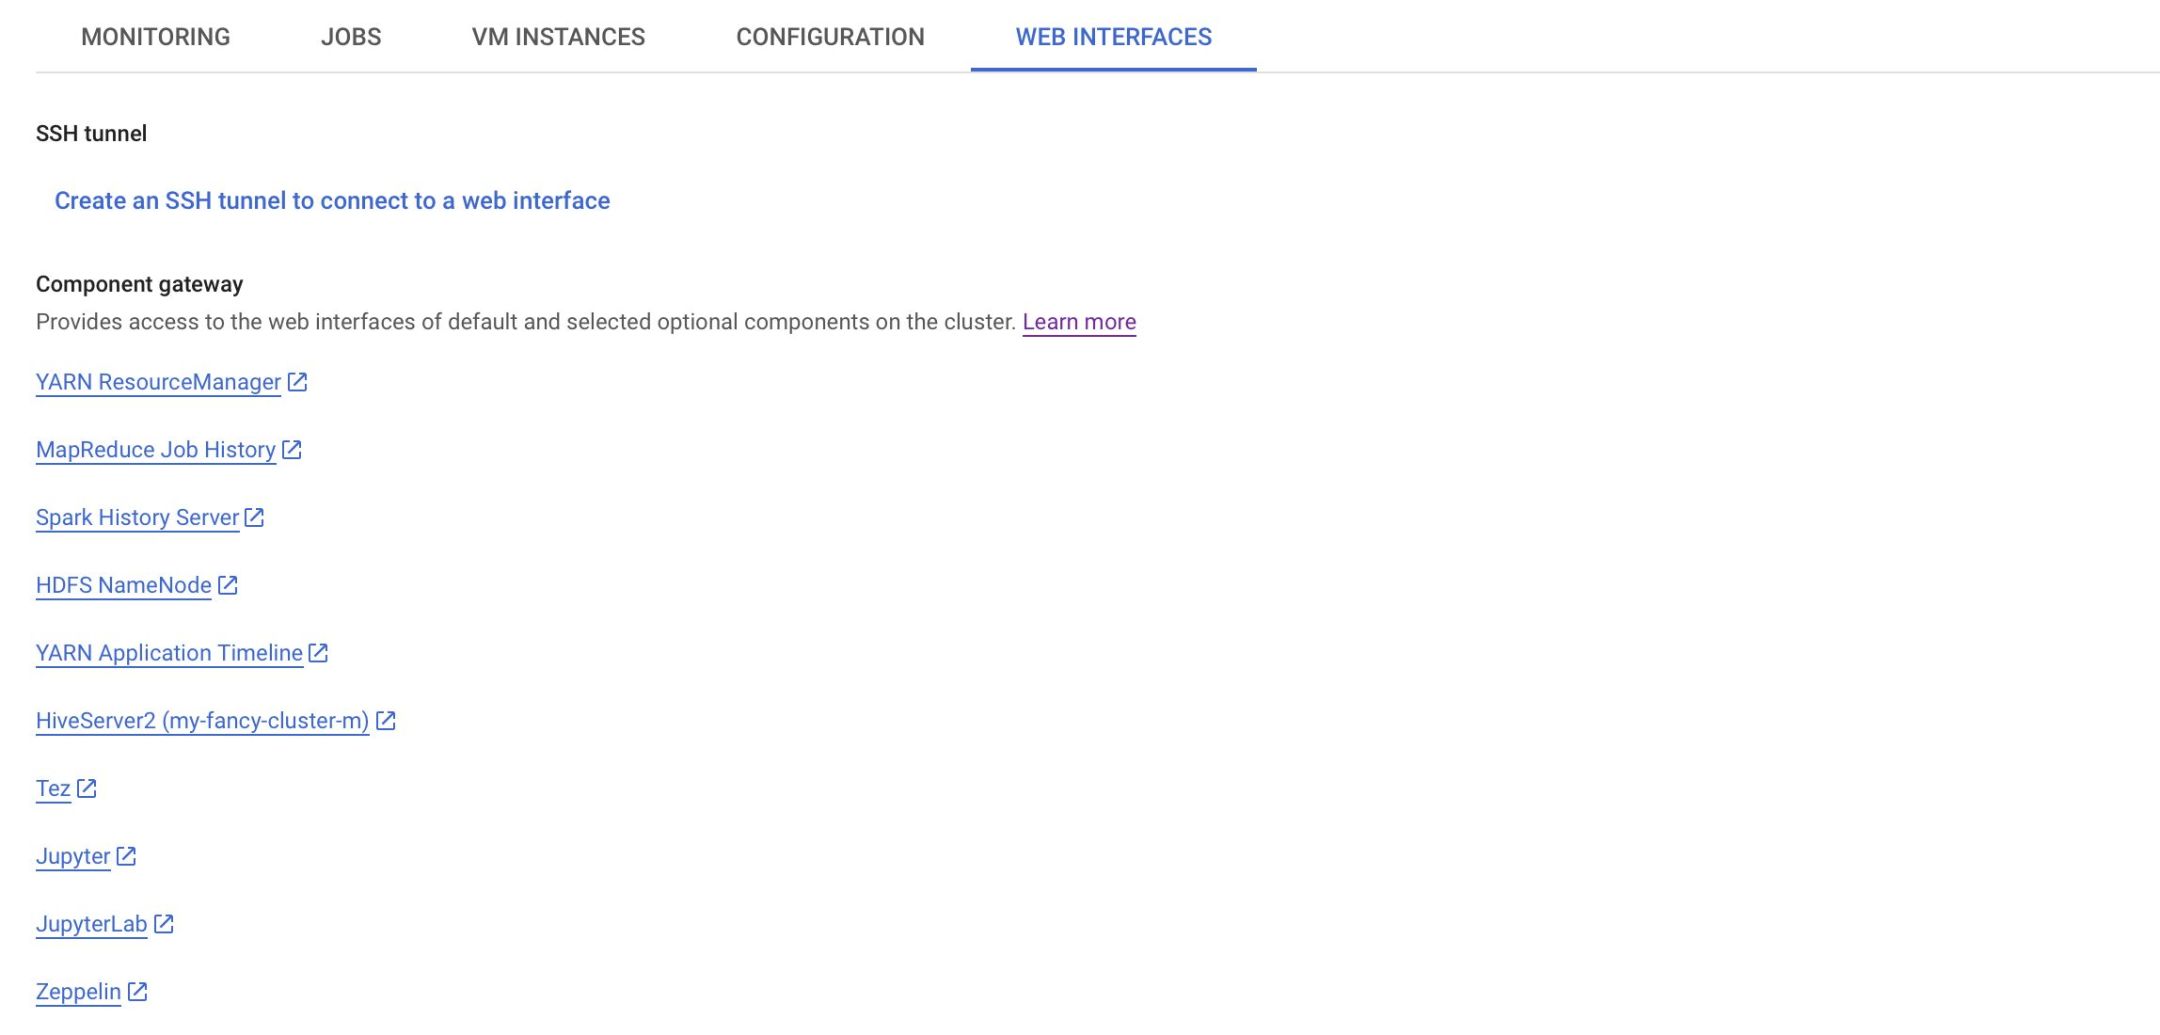
- Click on the Web Interfaces tab and click on the Zeppelin link at the bottom.
Tip: If there is nothing here, you may have forgot to enable the Component Gateway during the cluster creation. The easiest way to fix this is to just create a new cluster where you enable this option
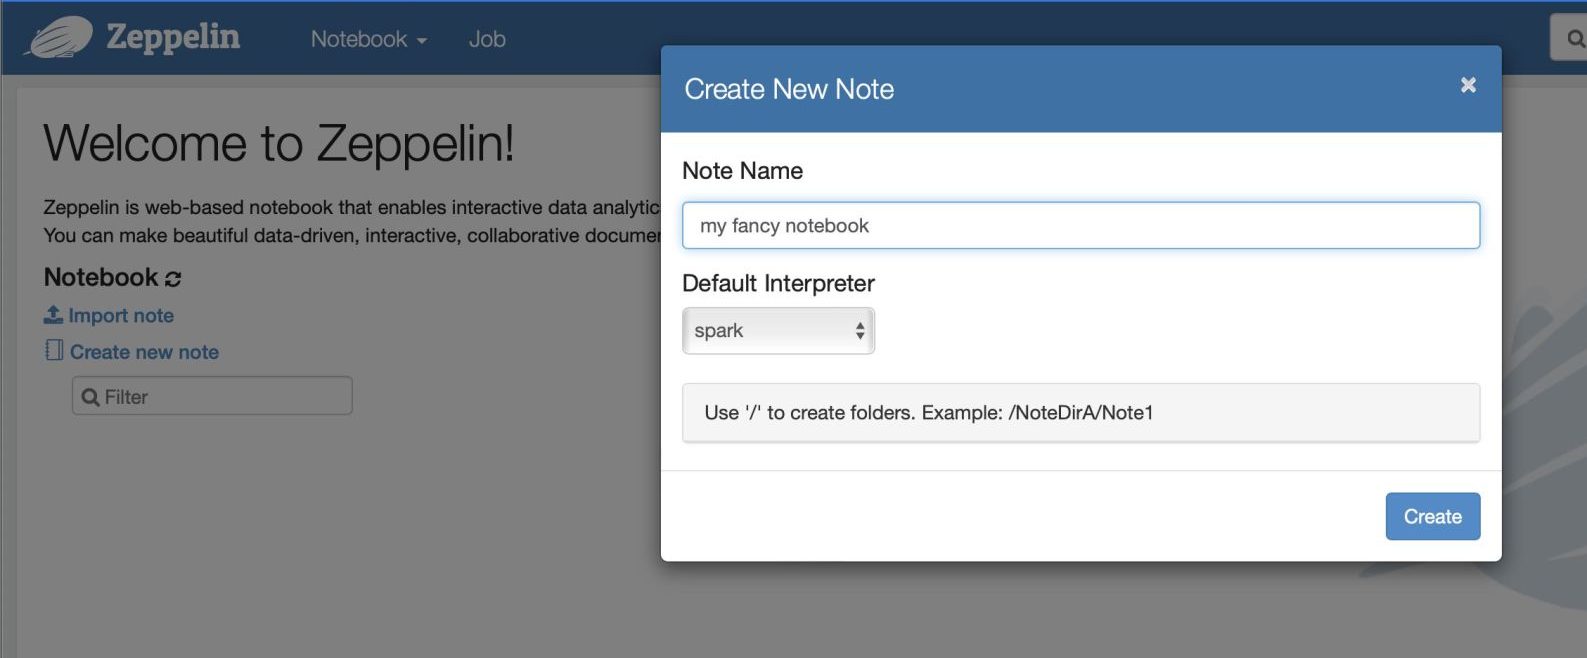
- On Zeppelin, simply click on Create new note or Notebook > Create new notebook, choose a name and leave spark as interpreter and click on Create
And we are done setting up everything we need to get started! Checking the clock, this took less than 5 minutes!
Writing our first Spark query!
If, like me, you never used Spark, you’ll probably think: „Ok nice, but what now?“
Let’s connect to our flight data that we just dropped to our Cloud Storage. Take this code sniped and paste it to your newly created Notebook. Then click on the run button.
%pyspark
airports_raw = spark.read.csv(„gs://YOUR_BUCKET/flight-data/airports.csv“, sep=“,“, inferSchema=“true“, header=“true“)
airports_raw.show(5)
Tip: If you lost the bucket name, just back to your GCP console and copy it from the Dataproc Cluster overview.
This loads your CSV into a data frame that you can now work with 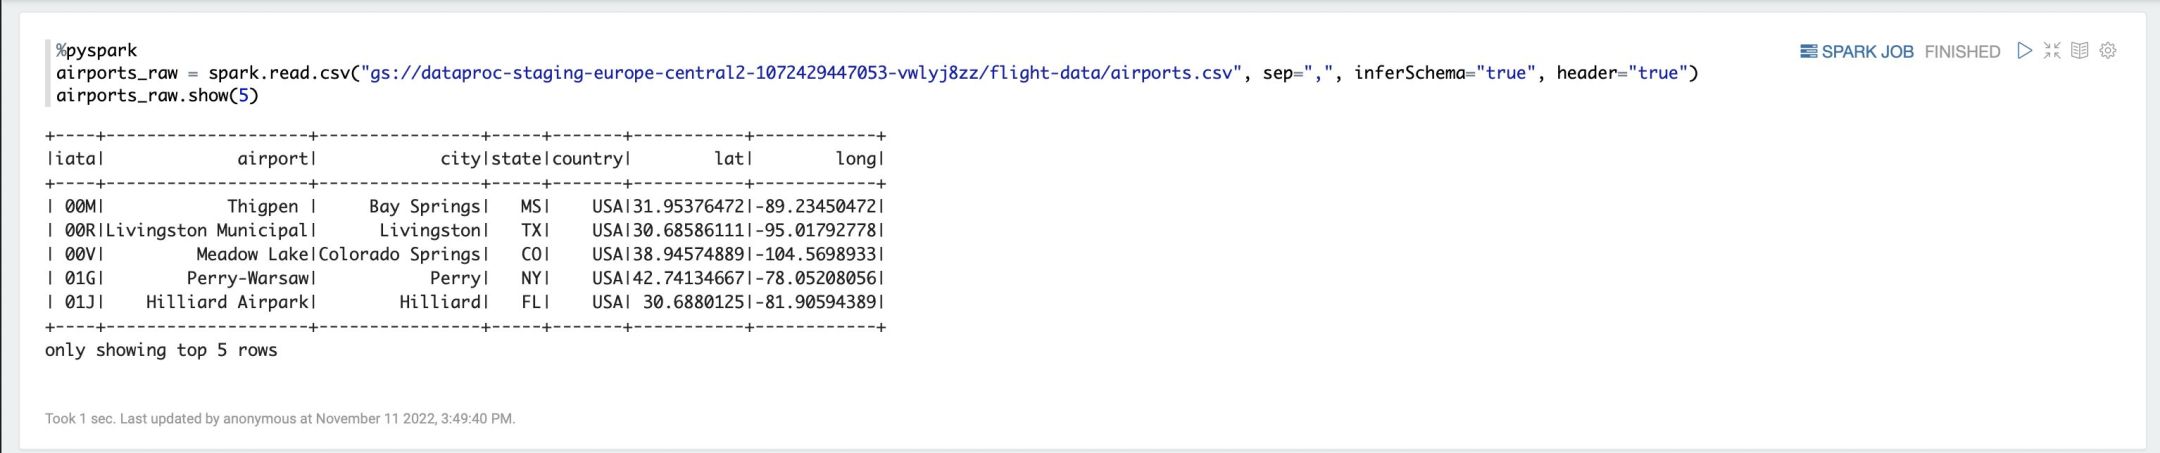
You can also easily convert this to a SQL View on
%pyspark
airports_raw.createOrReplaceTempView(„airports“)
And the starting writing SQL queries against your data:
%sql
SELECT * FROM airports

Turn off or delete your cluster!
Before we go to the conclusion, I’d like to remind you to go and turn off or delete your cluster to avoid using up all your free credits!
What’s next?
The biggest question I had when I got to this point was: „Well that was a lot of effort to open a CSV and run some queries“. The first moment where Spark made sense to me was when I realised that you can read entire folders with hundreds or thousands of CSV files using the spark.read.csv() command by just passing in a folder instead of a file. This means, that you can run queries directly on your gigabytes of CSV files distributed across multiple computers. Having previously only worked with databases or local analytics tools, this was quite the revelation for me.
Another thing that caught my eye was the „parquet file format. It allows you to partition your data and store them automatically in a very efficient folder structure that makes querying the data blazingly fast. This opens a whole new world of Data Pipeline Engineering which I previously had not looked into yet.
So if this sparked your interest (pun intended), I’d recommend you to look into some Spark tutorials and just play with it.
Conclusion
I hope this blog post gives complete Spark newbies and easy & fast entry to writing some queries and playing with the technology.
Overall I think Google Dataproc is as good a place to set this up, as it requires no local installations and no technical knowhow to do so. The 300$ free credits are nice and maybe HSLU has some additional credits.
I feel this is already much easier than trying to setup the docker environment. Personally I wish there was an even more convenient way that would do away with the need for setting up a dedicated cluster. I’m pretty sure there is and I simply have not found it. But then again, my big data journey has just started.
