Over the last seven days, you may have found that as you continue to use Twitter, you come across more and more interesting people to follow, and your following also grows exponentially. Keeping track of them all can be a challenge, and sometimes you will want to focus on certain groups of them over others, or check in on some people only sporadically. This is hard to do in the undifferentiated stream of tweets on your Twitter feed, where they are all mixed in together. Fortunately, there are ways to split up your Twitter stream and group the people you follow into separate streams, so you can keep an eye on their tweets as it suits you.
You might want to group the people you follow into any of the types that we looked at in Day 3. Some examples might be
- Colleagues or services at your institution
- Colleagues and peers across the country/world in a particular field
- Course participants
- Professional or funding bodies
- News accounts
- Social, personal or fun accounts
Twitter lists
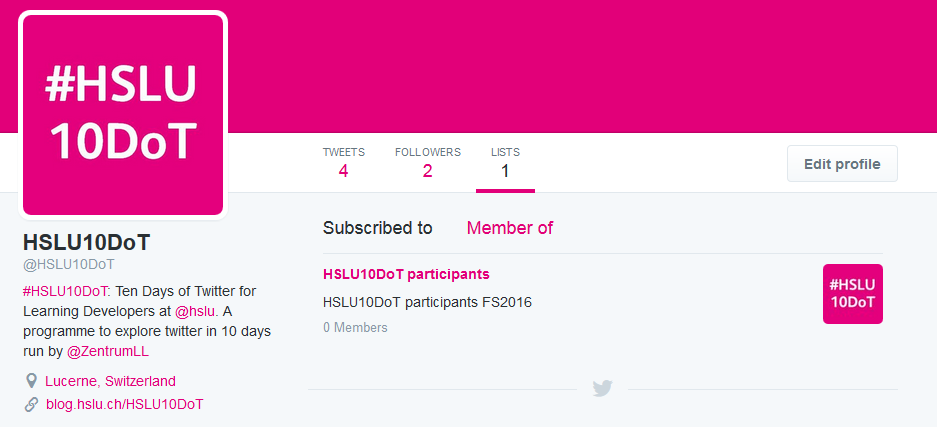
Twitter has a feature which allows you to make lists of people – and you need not follow all of them to add them to a list. These lists can be private, so only you can see them, or they might be public so you can share them with others. I created such a list for the participants of this course on Day 2, so you could find each other on Day 3. You might create such a list for the benefit of others, for example, to bring together the attendees at a workshop or conference, students on a particular programme or module, or the top accounts on a particular topic which you recommend other people should follow. You can share a list by giving people the URL of the list page, or let them view the lists you’ve created on your profile, where they can subscribe to your lists too.
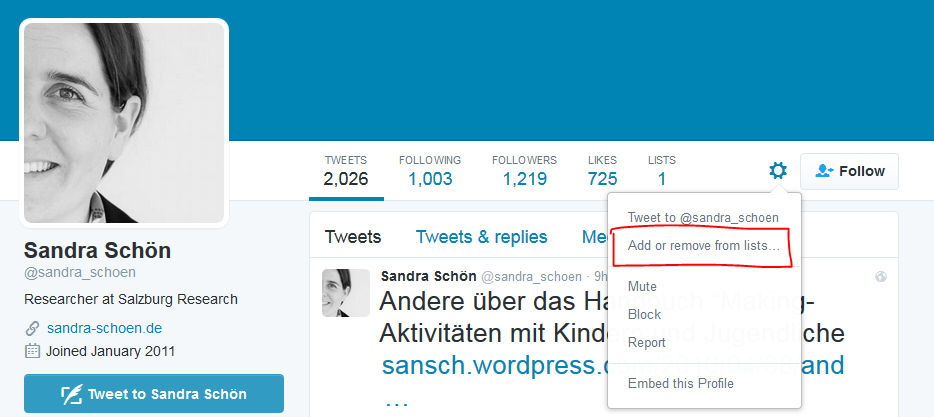
To create a list on Twitter, click on your small Profile Picture at the top of the screen, and select ‘Lists’, and you will see a page which will contain any lists you will make. Click on ‘Create list’, and you will be asked to name your new list and add a brief description. This description will be very helpful if you now choose to make the list public, so others can find and subscribe to it. You will now be invited to search for people to add to your list. You can also add them later, by clicking on their @name and going to their profile. If you click on the Gear Wheel you will see a menu containing the option ‘add or remove from lists’.
 To view your lists, or those of other people, you can simply go to ‘lists’ on your ‘Me’ tab (one of the options across the top), and see only the tweets from the people in that list.
 Block, Report and Mute
While we’re on the topic of managing people, you can also block or report people, for example, if you are followed by a spam account or someone you don’t want following you. Blocking accounts on Twitter tells you how you can block or mute activities from unwanted or undesirable accounts.
Extras
If you’re keen to explore further, you might look at the following tips, or you might return to them later on, when you’ve been using Twitter for a while:
Third Party Apps
The beauty of Twitter is in its simplicity as a platform. However, sometimes you need a bit more functionality. You might want a more convenient way to view different aspects of your Twitter stream, or even add in updates from other platforms such as Facebook or LinkedIn together with Twitter, so your whole social media stream is visible in one place. To do this, you can use one of the third party applications that were developed to make Twitter easier to use.
Tweetdeck
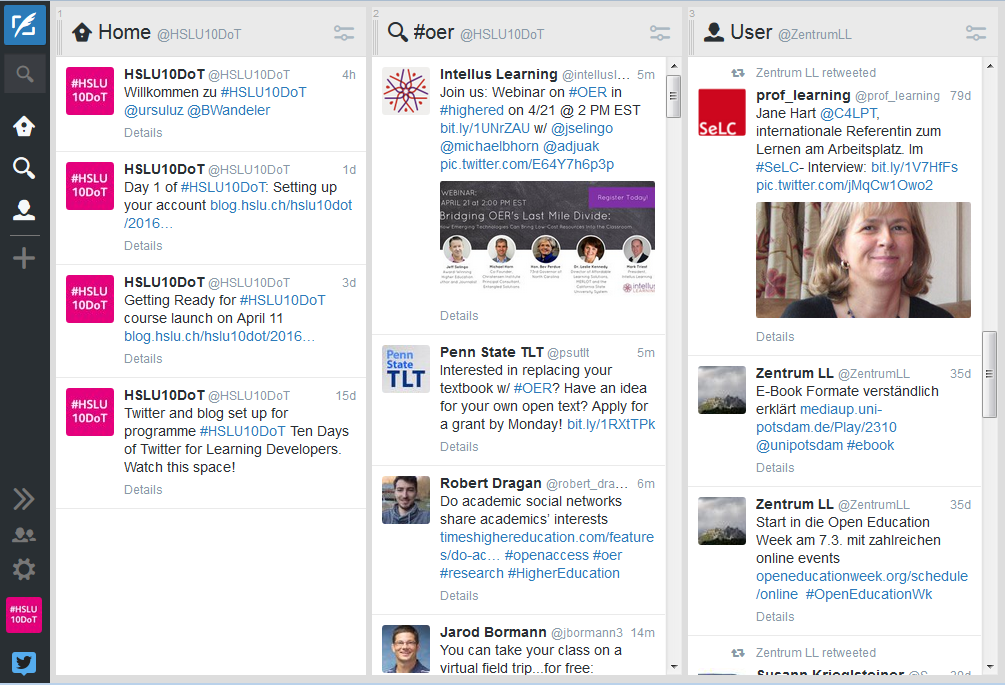
Tweetdeck is owned by Twitter, and is a good way to manage more than one account, if you have more than one (for personal and professional use, or perhaps an individual one and an official one on behalf of an institution). I am using Tweetdeck to tweet from @HSLU10DoT and @ZentrumLL at the moment, without having to log out of one account and into another – and it’s easy to get confused and tweet from the wrong one! However, you can also use Tweetdeck to split your Twitter stream into columns divided by people. It will import any lists you have made on Twitter too. Moreover you can schedule Tweets (that is what I am doing for the daily tasks).
You will need to create an account, with an email address and password. Once you have set up an account, you can connect your Twitter account(s). You can use it as a web-based application to access from anywhere, or you can download the Tweetdeck app to your computer (there is no app for smartphones or tablets). Tweetdeck is organised into a number of columns, and gives you a number of columns automatically, such as your timeline, your own tweets or your @mentions (tweets that mention you), and you can add new columns for the lists you create. You can also create new lists in Tweetdeck. Click on ‘add column’, and choose ‘lists’ (or any other column you want to add!).
You can do everything we’ve covered in Twitter on Tweetdeck too, including shortening URLs. Tweetdeck also makes some other things in Twitter a little bit easier.
Hootsuite
Hootsuite is similar application to Tweetdeck, but it allows you also to import other social media accounts such as Facebook, and it is also available as an app for mobile devices. You can sign up using Facebook, or if you prefer to keep Facebook separate from your professional social media use, you can sign up with an email address, name and password. It will then ask you to add your chosen social network accounts. You can then add streams of content similarly as in Tweetdeck, and tabs for the different social networks. Hootsuite has a quick start guide to help you set up your account.
The other bonus of tools like Tweetdeck and Hootsuite is that you don’t see the advertising ‘promoted tweets’ from companies you don’t follow!
Activity for Day 8:
Think about the kinds of update you’ve seen on Twitter so far from the people you follow. Who do you most want to see tweets from? Create a list of your colleagues on Twitter, or perhaps one for the people you do not want to follow directly, choose private or public.
You might want to explore TweetDeck or Hootsuite. Note, these tools are also helpful for managing information. More about this on Day 9.